From the first sign-in to the final claim.
Practical instructions for employees, managers and finance. Create trip requests on the web today. GPS recording, receipts and claim preparation currently require private Android access; no public Android installer or iPhone app is available.
For the company owner or administrator
Set up your company
- Create your workspace using your company name, work email, first and last name, and a password of at least eight characters containing upper- and lower-case letters and a digit. Email ownership is not currently verified at signup, so check the address carefully.
- Choose a unique workspace code: 3–30 lowercase letters, digits or hyphens, with no leading or trailing hyphen. Web sign-in uses your work email; Android sign-in also needs this code.
- Every signup starts a 14-day Professional trial with no card required. Without a paid subscription it falls back to Starter. Review plans, seats and trial limits before inviting the team.
- Sign in and open Configure → Company profile. Required general fields are company name, phone, email, street, city, postal code, country and timezone. Website, description, province/state, logo, colours and business hours are optional. The separate billing contact form requires contact name, email, phone, street, city, postal code and country; tax/VAT details depend on your billing circumstances.
- Open Manage → Employees. Add employees, choose a role and assign their approval manager. An employee ID is generated and can be replaced with a payroll ID. Use a single-use password-setup invitation or a temporary password that must be changed on first sign-in.
- Review Team structure, Travel policies, Locations and Access control. An employee without an approval manager can save a draft but cannot submit it. A company admin without a manager follows the root-admin rule and can receive immediate approval.
Web request creation is available now. Confirm private mobile access before promising GPS recording or expense capture. Check mobile availability; do not distribute a development build as a public release.
Back to topFor everyone
Sign in and find your workspace
- Use Sign in in the browser, then enter the work email and password attached to your Voyage account. The web sign-in identifies the workspace from your account email. If it cannot find the right account, ask your administrator to check your details.
- On mobile, select your company using the workspace code supplied by your administrator. Check the company name before entering your credentials.
- If you received an invitation, open its password-setup link first. If you received a temporary password, complete the required password change.
- Use Forgot password if needed. Check your inbox and junk folder, and use the latest reset email. If the link has expired, request another.
You need a connection for company lookup and initial sign-in. Check mobile availability. No public Android installer is available; use only installation instructions supplied through your company’s verified access. Your invitation includes the workspace code; ask your administrator if you need it. The iPhone app is not yet available.
Back to topFor every signed-in company employee, including administrators
Create and submit a travel request
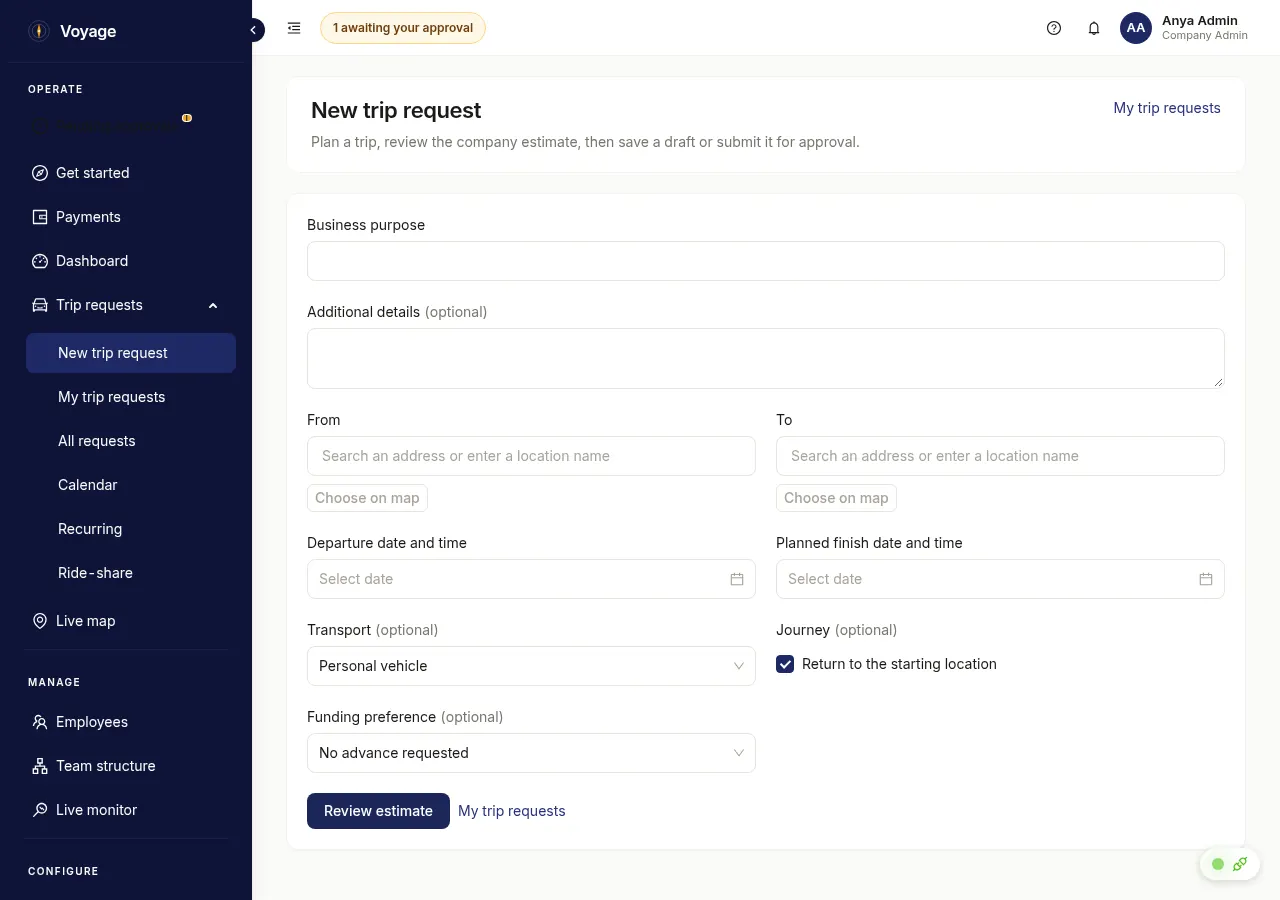
- On the web, choose Trip requests → New trip request, or use the dashboard or Get started button.
- Enter the business purpose and optional details. For From and To, select a matching address. If address search is unavailable, use Choose on map, place the actual pin, then select Confirm map pin. For known coordinates, preview them first and confirm the pin. Manual pins are saved with their actual coordinates; typed search text is not treated as a verified address.
- Choose the departure and planned finish date/time. Finish must be after departure. Choose the transport and whether you return to your starting location. Enter a quoted fare for flight or public transport.
- Choose Funding preference. An advance needs the requested amount; approval and payment remain separate company decisions.
- Select Review estimate. The backend uses the route and company settings. Read any approximate-route notice: finance must review fallback-route funding before an advance is approved.
- Use Save as draft or Submit for approval. My trip requests shows only your own requests. Open View request for details and the current decision.
- If submission is blocked because no manager is assigned, your draft remains saved. Ask your company admin to assign a manager, then use Submit for approval on the saved draft. Do not create a replacement request.
The web form currently supports a single destination with an optional return. Multi-destination planning is currently in the company-provided Android app. The web needs a connection and does not record GPS, capture receipts or prepare final claims. A route estimate is not approved actual mileage.
If a save response is lost, use the retry action in that form: it keeps the original creation identity. Check My trip requests before opening another form. A saved draft is not permission to travel.
For managers and authorised approvers on the web
Review a request and approve travel
- Open Pending approvals. Select a request you are authorised to review.
- Read the purpose, traveller, dates, itinerary, estimated costs and policy information. Check each leg of a multi-stop journey.
- Approve or reject the request using the available action. Enter the requested reason or comments so the employee understands your decision.
- Check the resulting status and approval progress. A request may need another approval before travel can start.
Use Trip requests to find an existing request and review its details. Trip approval and approval of money are separate steps: an approved trip does not mean an advance has been paid.
Back to topFor employees and finance
Request and record money before travel
- On the web choose Funding preference → Request a travel advance; in the company-provided mobile request review, select Get estimated reimbursement before travel. Enter the requested amount and any explanation. Company rules may limit the amount or require more notice before departure.
- Submit the travel request. Track the Payment section in its details for requested, approved and paid amounts.
- Finance opens Payments on the web, reviews the advance and approves or rejects it. A fallback route estimate requires a finance-entered amount and reason before funding can be approved.
- Finance arranges the payment through the company's usual banking process, then records it in Voyage with the payment details and reference requested by the form.
Voyage records and tracks employee payments; it does not send an EFT to the employee. A payment status is an accounting record. Confirm actual receipt with your bank and finance team.
Back to topThese mobile steps require private Android access. The web does not record GPS or capture receipts; no public Android installer or iPhone app is available.
For employees using mobile
Start, track and end your trip
- Before departure, check that your request is approved and synced. Enable device location services and grant the location permissions requested for trip tracking, including background access where prompted.
- Open the approved request or active-trip view and tap Start Trip. Wait for confirmation. If the device cannot find your location, move outside or near a window and retry.
- Keep tracking available while travelling. Follow your device's background-location and battery settings so the operating system can continue collecting fixes.
- At the end of the journey, use End Trip where the company-provided build requires manual completion. Read the confirmation and any GPS evidence message. If offline, the completion and location trail must still reach the server.
- Reconnect and check GPS Sync Status. Use Manual Sync where available. Open the completed trip summary to check the mileage GPS result before submitting your final claim.
The distance displayed on the phone is not, by itself, an approved mileage amount. Reimbursement uses accepted server-stored trip fixes and integrity checks. Missing samples, implausible movement, a route that does not match the trip, or mock-location indicators can prevent automatic mileage assessment. Passenger mileage is not automatically reimbursed.
If evidence is insufficient or flagged, preserve the trip and receipts and ask finance to review the result. Do not add a manual mileage expense to replace a blocked GPS assessment.
Back to topThese mobile steps require private Android access. The web does not record GPS or capture receipts; no public Android installer or iPhone app is available.
For employees using mobile
Add expenses and readable receipts
- Open the Expenses tab to see your expense records and statuses, then choose Add expense. You can also choose Add Expense from the trip summary.
- Select the correct travel request. Tap Add receipt photo to capture or attach the receipt using the options shown. Grant camera or photo access when needed.
- Enter the merchant, amount and date from the receipt yourself. Automatic receipt reading is currently unavailable. Retake a blurred image and make sure the total is readable.
- Choose a category, enter the description and check all required details. Check the displayed currency against the receipt. The currency is read-only in this form; if it does not match or conversion is needed, ask finance before submitting.
- Use Save draft if you are not ready, or submit the expense using the form action. Confirm that it saved, or note the pending-sync message if you are offline.
- To finish a saved draft, return to Expenses and choose Edit or submit draft on its record. Check or change the details, then save or submit it. Saving updates that same draft; you do not need to create another expense. Submitted, approved and rejected records are read-only here. Use View receipt to reopen an attached receipt when available.
GPS-calculated mileage records are managed with the final claim and cannot be edited as ordinary expense drafts. Submitting an expense and submitting a final reimbursement claim are separate actions. Keep the original receipt according to your company's policy, and follow its deadlines and receipt requirements.
Back to topFor employees and finance
Submit the final claim and settle the balance
- Complete the trip and let pending trip events, GPS points and expenses sync. Add any remaining receipts.
- Open the completed trip summary and find Reimbursement. Review the expenses, mileage GPS check and any advance already paid.
- Tap Submit claim and confirm. The claim brings together the trip's unclaimed expenses and eligible mileage for finance review. A claim without expense lines is only possible where mileage or a paid advance needs settlement.
- Finance opens the claim in Payments, checks receipts and the GPS reconciliation, then approves the allowed amounts or rejects with a reason. Follow any error or policy message if submission is blocked.
- Review the final balance: Additional reimbursement due means more is owed to you; Amount you must return means the paid advance exceeded the approved actuals. Finance arranges any transfer or recovery outside Voyage, then records the outcome.
For example, if an approved final total is R800 and an advance of R1,000 was already paid, R200 must be returned. If the approved total is R1,200 instead, R200 remains payable. An advance is applied once; it is not a second reimbursement.
If a claim already exists, check its displayed status and contact finance about the next step rather than trying to create another. Final claim approval locks the GPS evidence used for that assessment.
Back to topThese mobile steps require private Android access. The web does not record GPS or capture receipts; no public Android installer or iPhone app is available.
For employees using mobile
Work offline and confirm your changes synced
- Sign in and load the information you need while connected. Some existing data is cached; new company lookups, address searches, estimates and receipt processing may still need internet access.
- When disconnected, read each confirmation carefully. A saved or queued change has not necessarily reached the company server. GPS points can be buffered for later upload.
- Reconnect, keep the app open and inspect its sync indicator. In an active trip, check GPS Sync Status and use Manual Sync if needed.
- Reopen the request after synchronisation and confirm the current server status. If a conflict or retry screen appears, read it before choosing a resolution.
Do not clear app storage, uninstall, discard a pending draft or clear a cache that contains unsynced work as a first troubleshooting step. Note the request, time and error, then ask your administrator for help. A queued request is not yet an approved request.
Back to topFor employees using mobile
Choose what you share
- Open your profile and Privacy controls. Review trip location tracking separately from sharing location with your manager.
- Review the individual switches for emergency contacts, vehicle details, favourite destinations, home address and banking details. Share only the information you intend your authorised company users to see.
- Review Ride-share suggestions and the leaderboard setting separately. Turning off matching removes you from suggestions; leaderboard participation is a separate choice.
- On the web use Account menu → Privacy & data → Download my data. You can also use the company-provided app’s data-export option where available. Read the confirmation carefully before requesting account deletion.
Turning off location tracking can prevent GPS-based mileage assessment. A planned-route estimate does not replace the evidence needed for automatic actual-mileage reimbursement. Sharing a profile field does not make it public: company access permissions still apply. See the privacy notice for more context.
Back to topFor authorised billing administrators on the web
Manage your company subscription
- Open Billing & plan. Review the current plan, seats, subscription status and estimated monthly cost.
- Check the billing country and tax number before checkout. Available currency, taxes and payment provider depend on the billing territory.
- Choose the plan and number of seats you need, then follow the checkout or management flow offered. Paid checkout depends on provider availability.
- Return to Billing & plan to confirm the updated status and download invoices when available. Read the cancellation confirmation before cancelling a subscription.
The Voyage subscription is the company's payment for using the service. It is separate from employee advances and reimbursement records. Employees can check their plan in mobile; subscription management happens on the web.
Back to topRoles, permissions and approval limits
Own scope covers the person’s records. Team covers their own records and reporting subordinates. All covers the company’s records, never another workspace. Base-role names describe the usual starting permissions. Your company can assign custom access roles and an Own, Team or All data scope. The permissions actually granted determine each menu and action; a label alone does not grant access.
| Role | Typical work |
|---|---|
| Employee | Create, save and submit own web trip requests; view own decisions. Mobile GPS, receipts and claims need private Android access. Company-wide employees, reports, finance and billing are not part of the default employee workspace. |
| Manager | Review requests routed through the reporting hierarchy, subject to approval permission and limit; see only the employee scope granted. Manager status does not automatically grant finance or billing access. |
| Finance | Review advances and final claims, record external payments/recoveries, and work with accounting where the plan and permissions allow it. Employee administration and subscription billing remain separate permissions. |
| Company Admin | Configure the company, employees, reporting lines, policies, locations and access. Authorised billing admins manage subscriptions. Admins can also request their own business travel. |
Trip approval limit is the per-person amount the person may approve in the hierarchy. Leaving it blank uses the base role’s default. Grant only the authority the person actually needs; the approval chain and permissions still apply. Assign reporting managers under Employees or Team structure.
Plans, seats and the 14-day trial
Every new workspace begins a 14-day Professional trial, with no card needed. If the company does not purchase a subscription, Starter applies after expiry. Records remain; paid-only features stop and new work is subject to Starter quotas.
| Plan | Default capacity | Entitlements |
|---|---|---|
| Starter | 50 active employees; 500 requests/month | Travel requests, approvals and basic reporting. Free. |
| Professional | 200 employees; 2,000 requests/month | Starter features plus advanced reporting, fraud indicators, bulk employee import, API access and accounting sync. South African price R49 per purchased seat/month before tax. |
| Enterprise | 1,000 employees; 10,000 requests/month | Professional and enterprise entitlements; agree pricing, integrations and support before purchase. |
Purchased seats cap active accounts on an active paid subscription, including administrators; the default capacity is not a promise of included paid seats. During the trial, the Professional default capacity applies. See Billing & plan and Company profile for the effective limits.
Two South African Professional seats are R98 net. If 15% VAT applies, the estimate is R14.70 VAT and R112.70 gross. Territory and tax details determine the actual checkout amount. No automatic charge occurs just because the free trial ends. Employee payments and the company subscription are different flows. Mobile availability is separate from subscription entitlements.
Back to topRun the company workspace
Employees: add, import and export
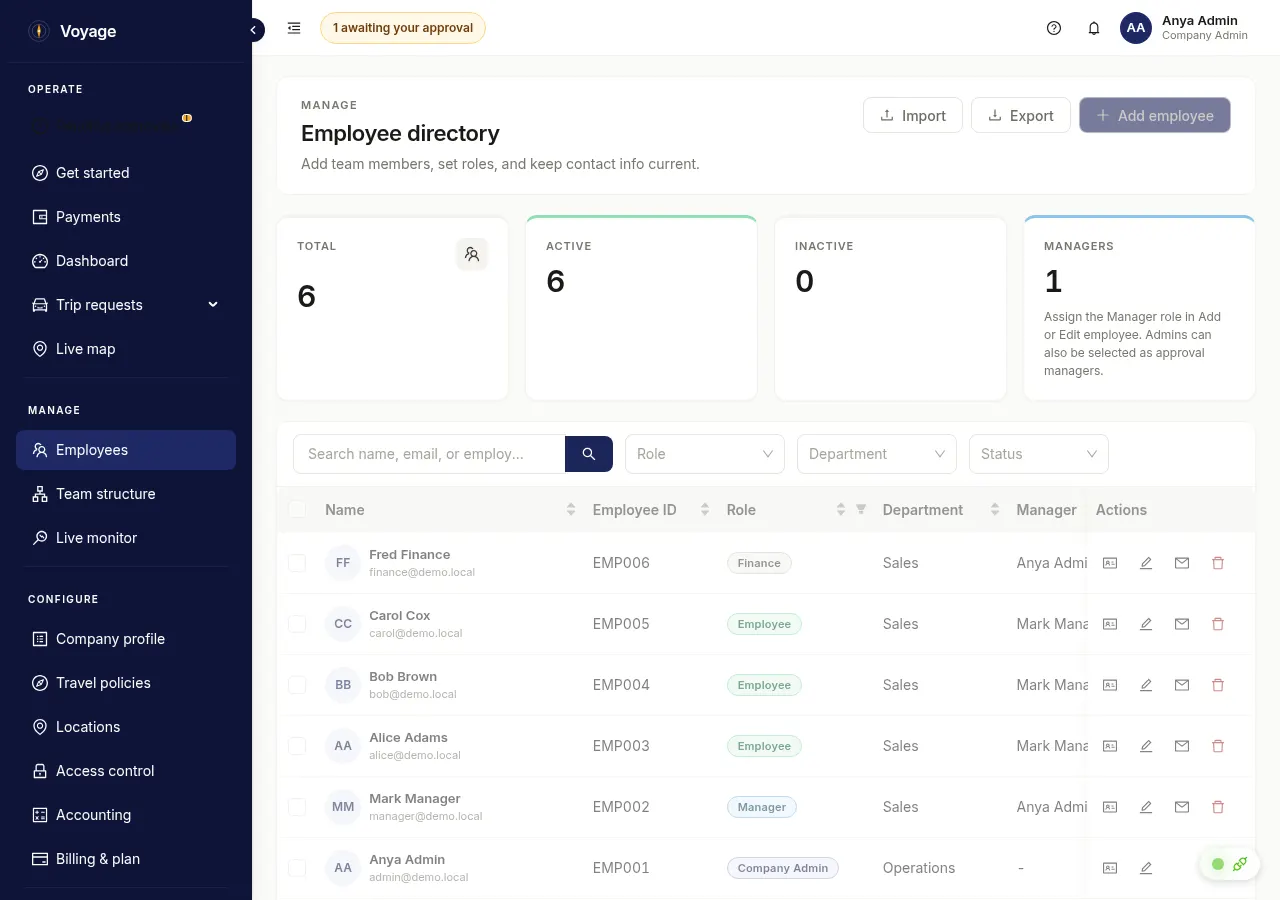
Use Manage → Employees to add or edit a person. An ID is generated before typing; replace it with your payroll identifier if needed. Choose Manager when a person should be offered as a reporting manager; Company Admins can also be selected. Assign each employee’s manager before submission. Use the directory’s import/export controls for CSV files. Bulk import needs the relevant permission and plan feature; check required columns and validation errors before confirming. Export follows your granted data scope. Download the CSV template first. Required headers are email, employeeId, firstName, lastName and role. Use the role values EMPLOYEE, MANAGER, FINANCE, ADMIN or COMPANY_ADMIN. Keep employee IDs and emails unique; inspect the preview and correct invalid rows before importing. Optional columns include department, position, phone, managerId and isActive. Do not include passwords in CSV files.
Team structure
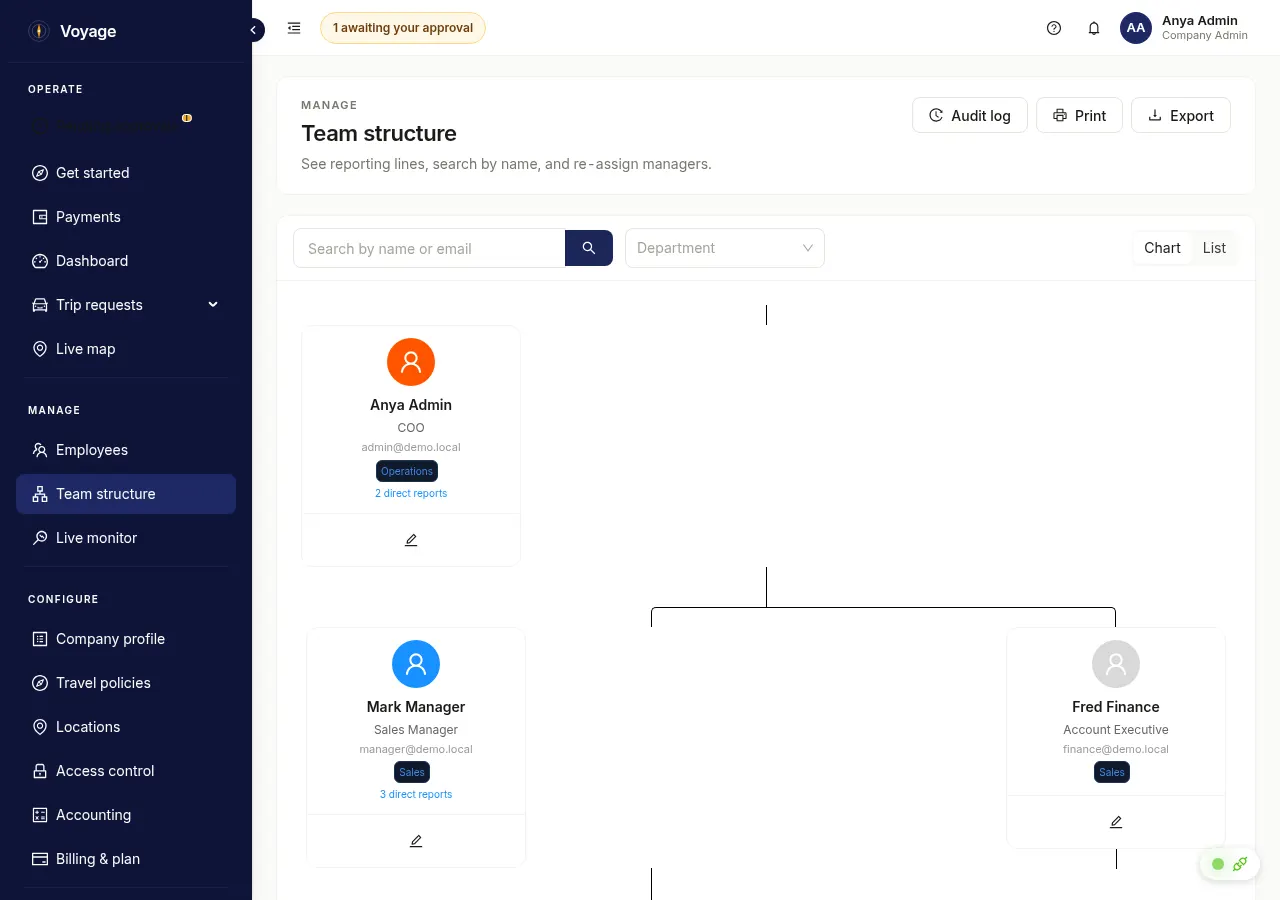
Open Manage → Team structure to inspect reporting lines. Use the available manager-assignment controls to change a reporting relationship, then verify the resulting hierarchy. A role label does not create a reporting line. You cannot make an employee their own manager or create a cycle.
Pending approvals
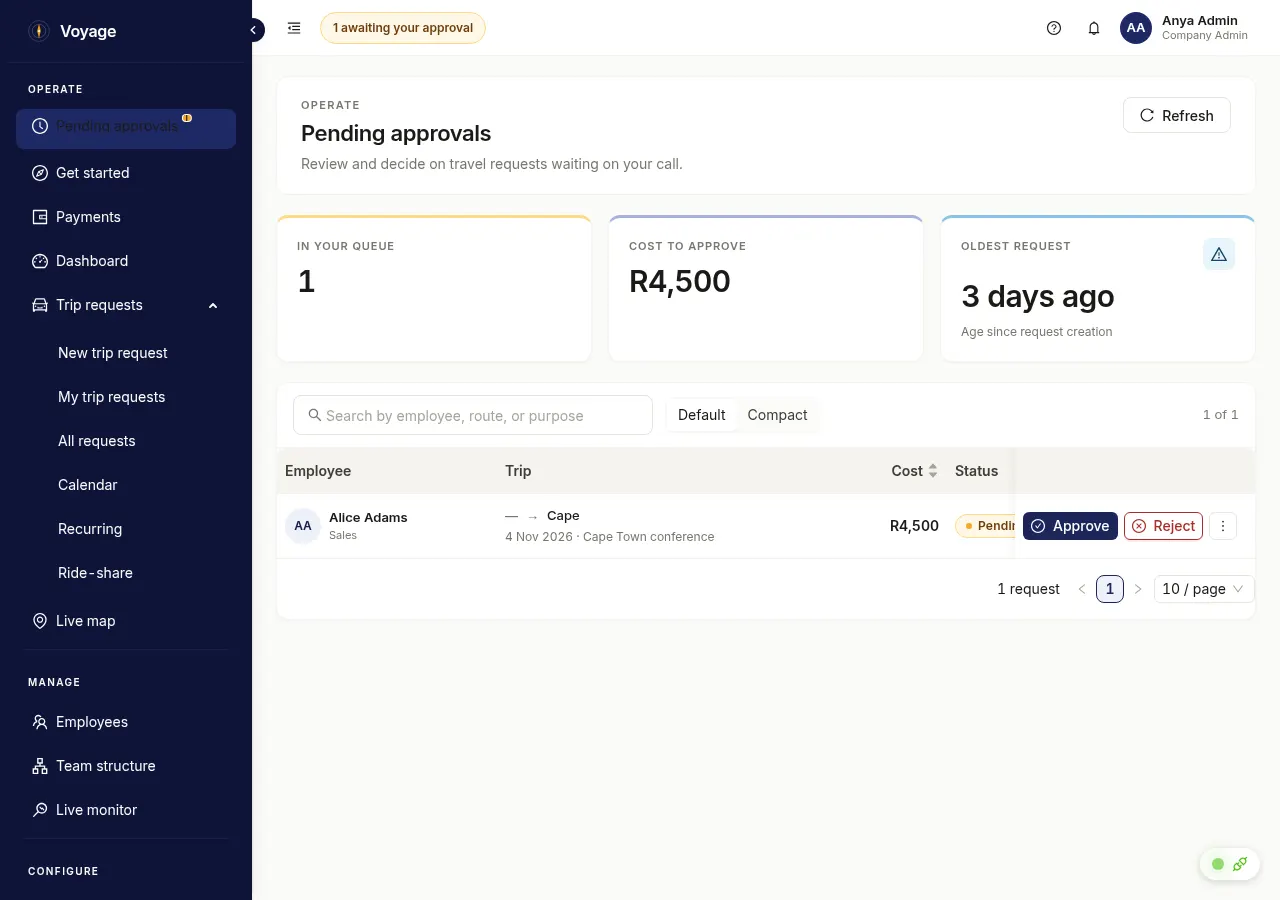
Open Operate → Pending approvals, inspect View request, then approve or reject with the requested comment or reason. Read the resulting status: some requests need another approver. Approving travel does not approve or record a bank payment.
Live monitor and Live map
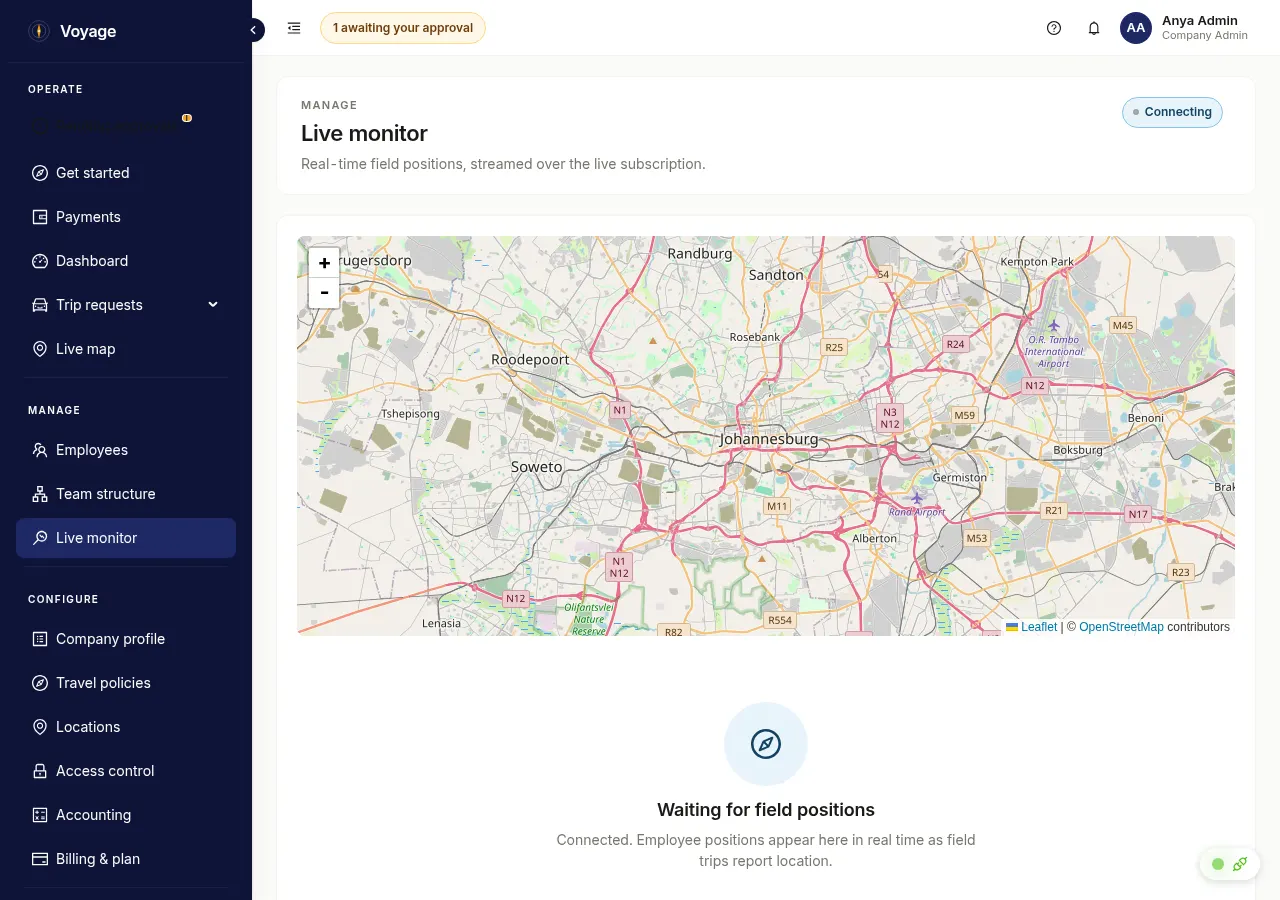
Manage → Live monitor and Operate → Live map show authorised business-trip location data. Use the displayed employee/trip filters and map controls. Missing, stale or offline location is not evidence that the traveller is stationary. Web monitoring cannot replace device location permissions or create a GPS trail.
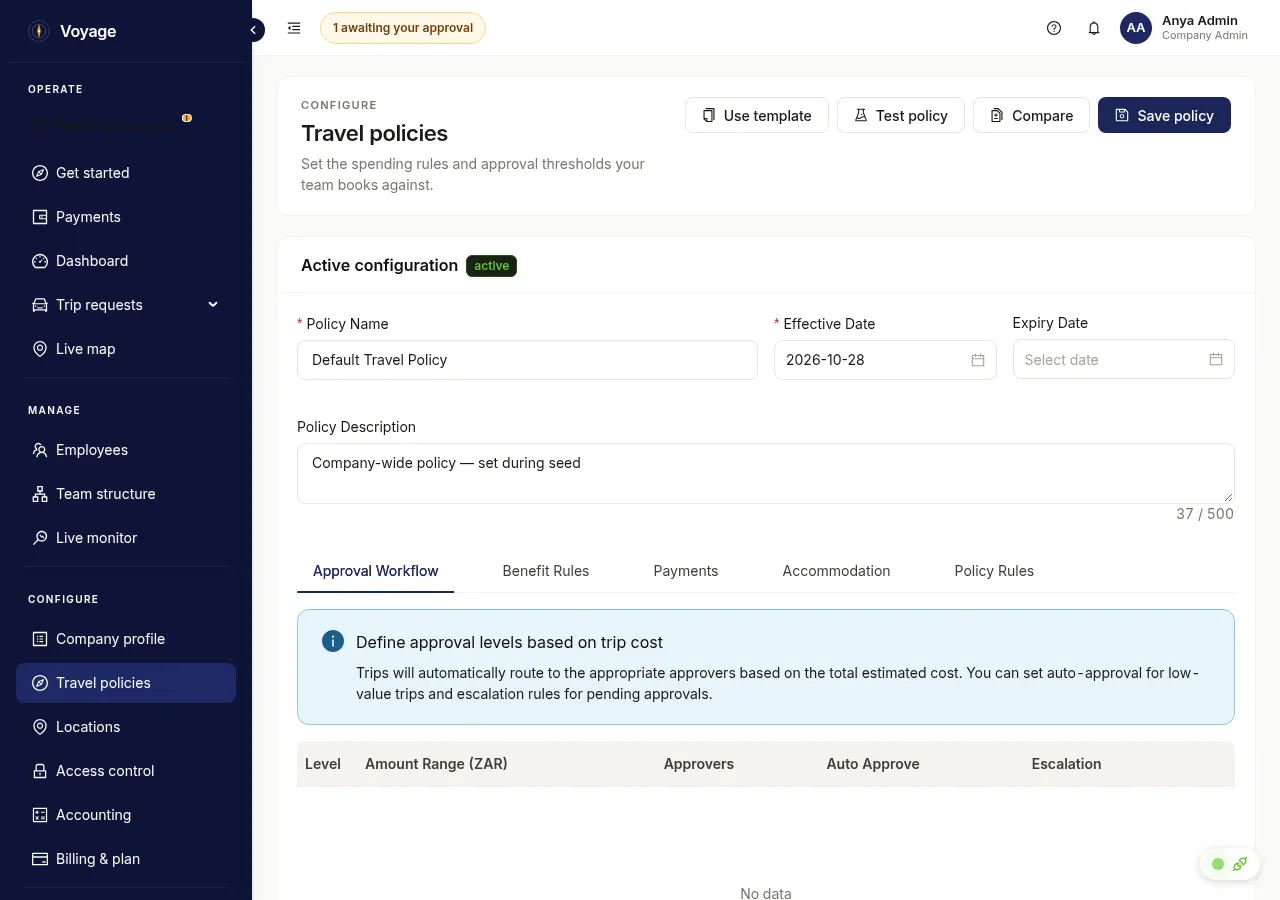
Travel policies
Open Configure → Travel policies. Review a policy or create one with its effective dates, mileage/allowance rules, limits and approval levels. Check the form’s validation, then save. The company’s rates and policy decide eligibility; software does not guarantee tax compliance or a particular rate.
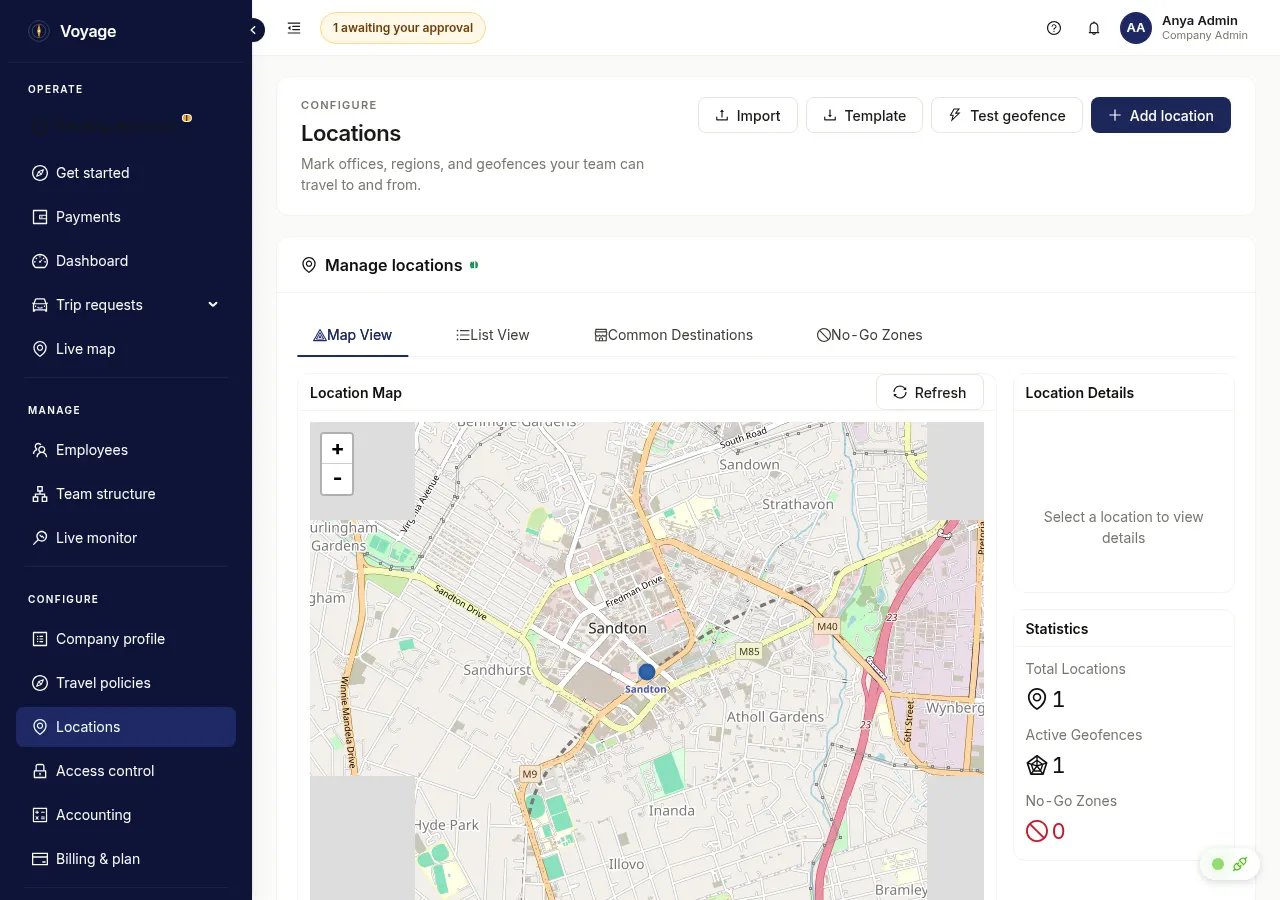
Locations
Use Configure → Locations to maintain offices, destinations and geofences. Enter the real address and map position, choose the location type and set any boundary rules. Save and verify the stored pin. Adding offices and geofences requires the matching write permission.
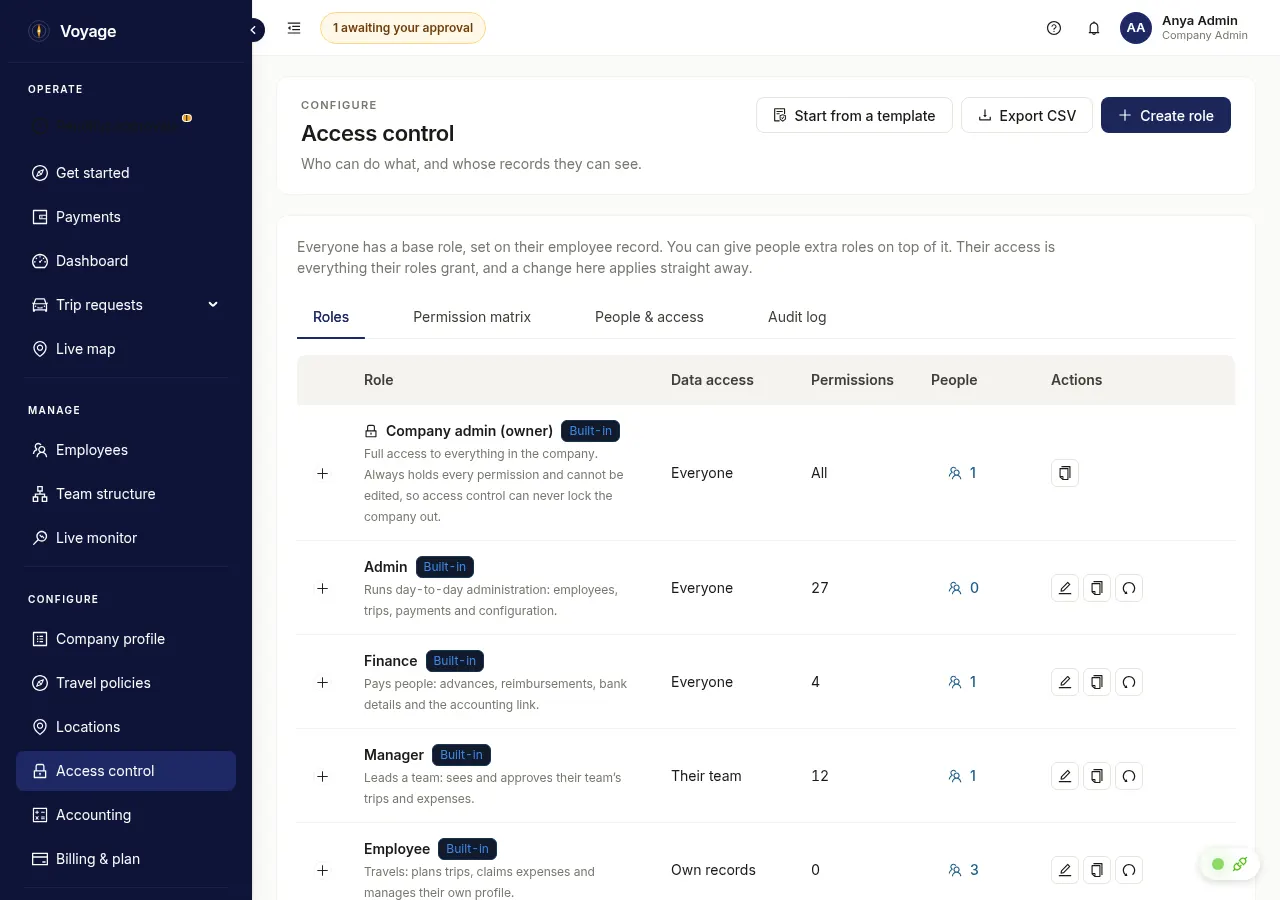
Access control
Open Configure → Access control to inspect roles, permissions and assignments. Give only the needed actions and Own/Team/All scope, save and check the employee’s resulting menu. This does not bypass personal-information sharing choices or approval limits.
Payments
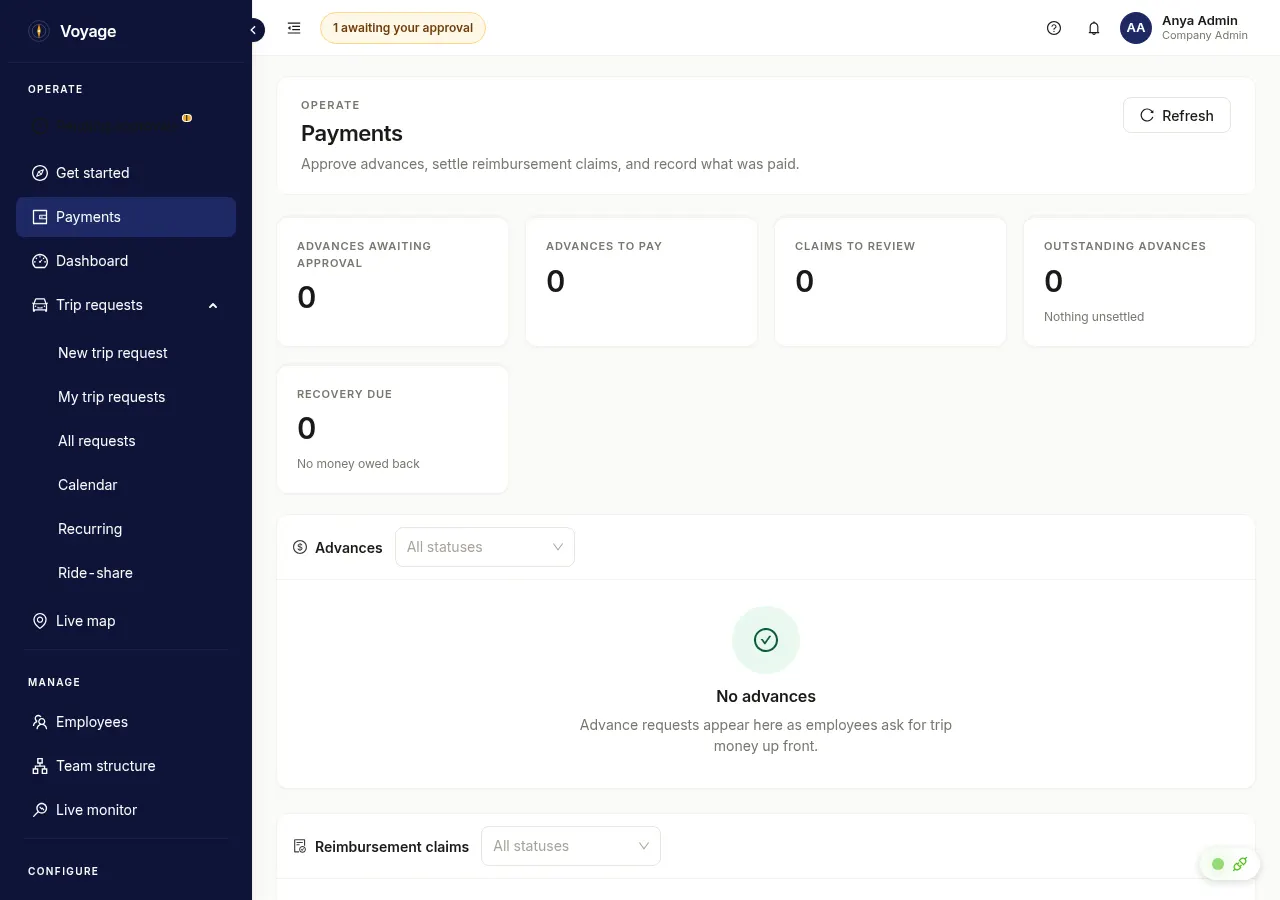
Open Operate → Payments to review advances and claims. Inspect the trip, supporting receipts, GPS assessment and amount before deciding. Arrange a transfer or recovery through your normal banking process, then record the date and reference in Voyage. A recorded Paid status does not itself send an EFT.
Accounting
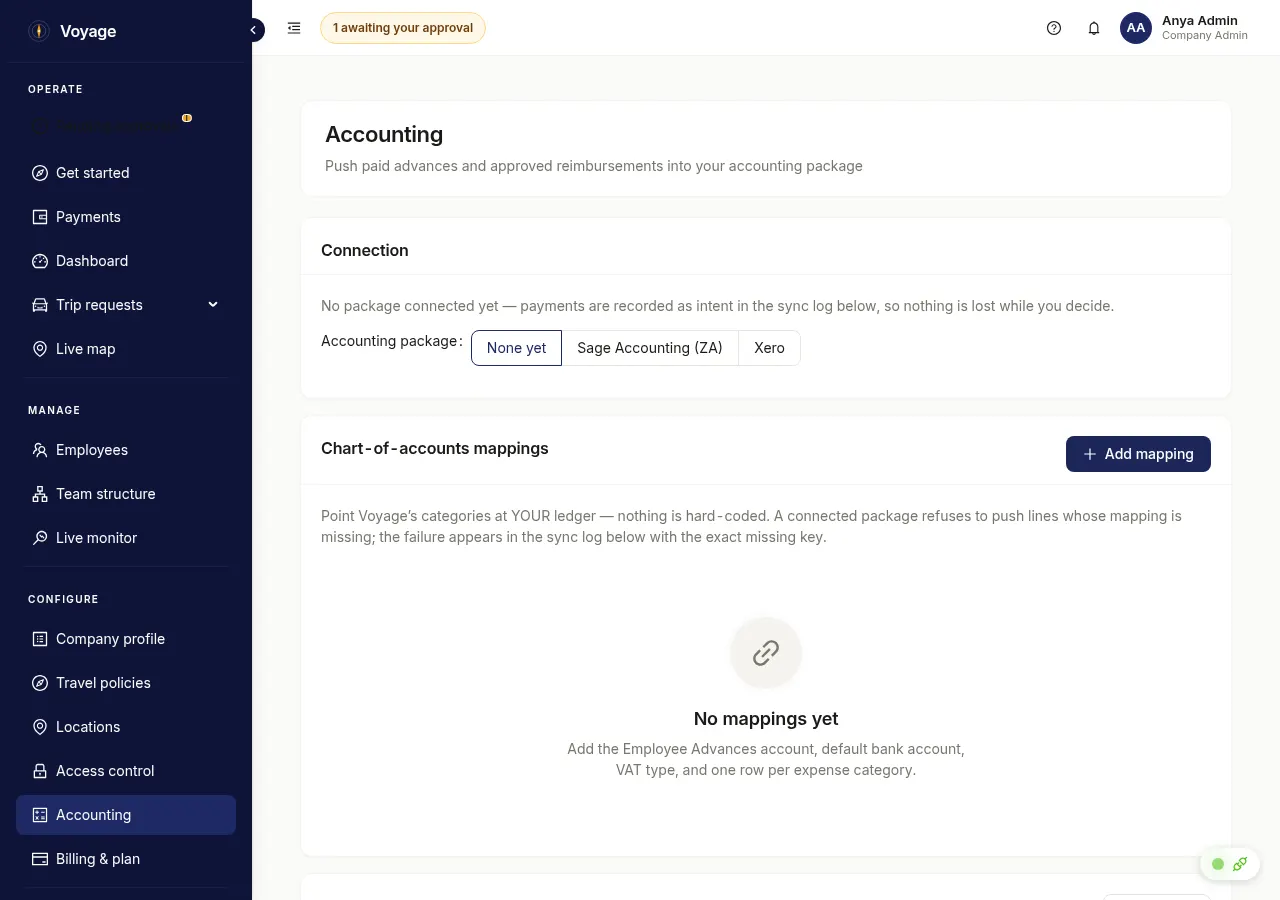
Open Configure → Accounting where the plan and permission permit it. Connect the configured Xero or Sage account, choose the required mappings and review sync results. An unavailable provider must be configured before connecting; do not assume a failed or pending sync reached the ledger. Review a record’s sync status before retrying.
For support use [email protected]. Privacy requests go to [email protected]; security reports go to [email protected].
Back to topStart with the message you can see
Fix common problems
- I cannot sign in.
- Check the company and work email, then use the password-reset flow. Ask an administrator to confirm your account is active. If asked to wait after repeated attempts, wait before retrying.
- A page or action is missing.
- Your role, data scope or plan may not allow it. Ask your administrator to review Access control. Use the employee mobile app for the on-road workflow.
- I cannot find an address or calculate an estimate.
- Check your connection, use a more complete address and verify the pin. If routing is unavailable, keep the request as a draft and retry; a fallback estimate may need finance review.
- My trip will not start or end.
- Check request approval, pending sync, device location services and app permissions. Move somewhere with a clear GPS signal. Read the exact error before retrying.
- My claim cannot be submitted.
- Confirm the trip is completed and synced. Check receipts, company deadlines, GPS assessment and whether a claim already exists. Send the precise error to finance.
- A payment says paid, but I have not received it.
- Ask finance for the bank-transfer reference and payment date. Voyage records the payment; your bank confirms receipt.
When you report a problem, include the page or screen, request identifier, time, what you tried and the exact error. Remove passwords, full bank details and unnecessary personal information from screenshots. Your company administrator is the first contact for account, policy, approval and payment questions.
Back to top